1.14 Water Sensor
The water sensor is specifically designed to detect the presence of water and is commonly used to sense rainfall, monitor water levels, and detect liquid leaks. It works by using a set of exposed parallel wire traces that measure the size of water droplets or the volume of water. The water volume is then easily converted into an analog signal, which can be directly read by the main control board to trigger a water level alarm.
Warning
The sensor cannot be fully submerged in water, please only leave the part where the ten Traces are located in contact with water. Also, energizing the sensor in a humid environment will accelerate the corrosion of the probe and reduce the life of the sensor, so it is recommended that you only supply power when taking readings.
Component List
Raspberry Pi Pico W x1
MicroUSB cable x1
830 Tie-Points Breadboard x1
Jumper Wire Several
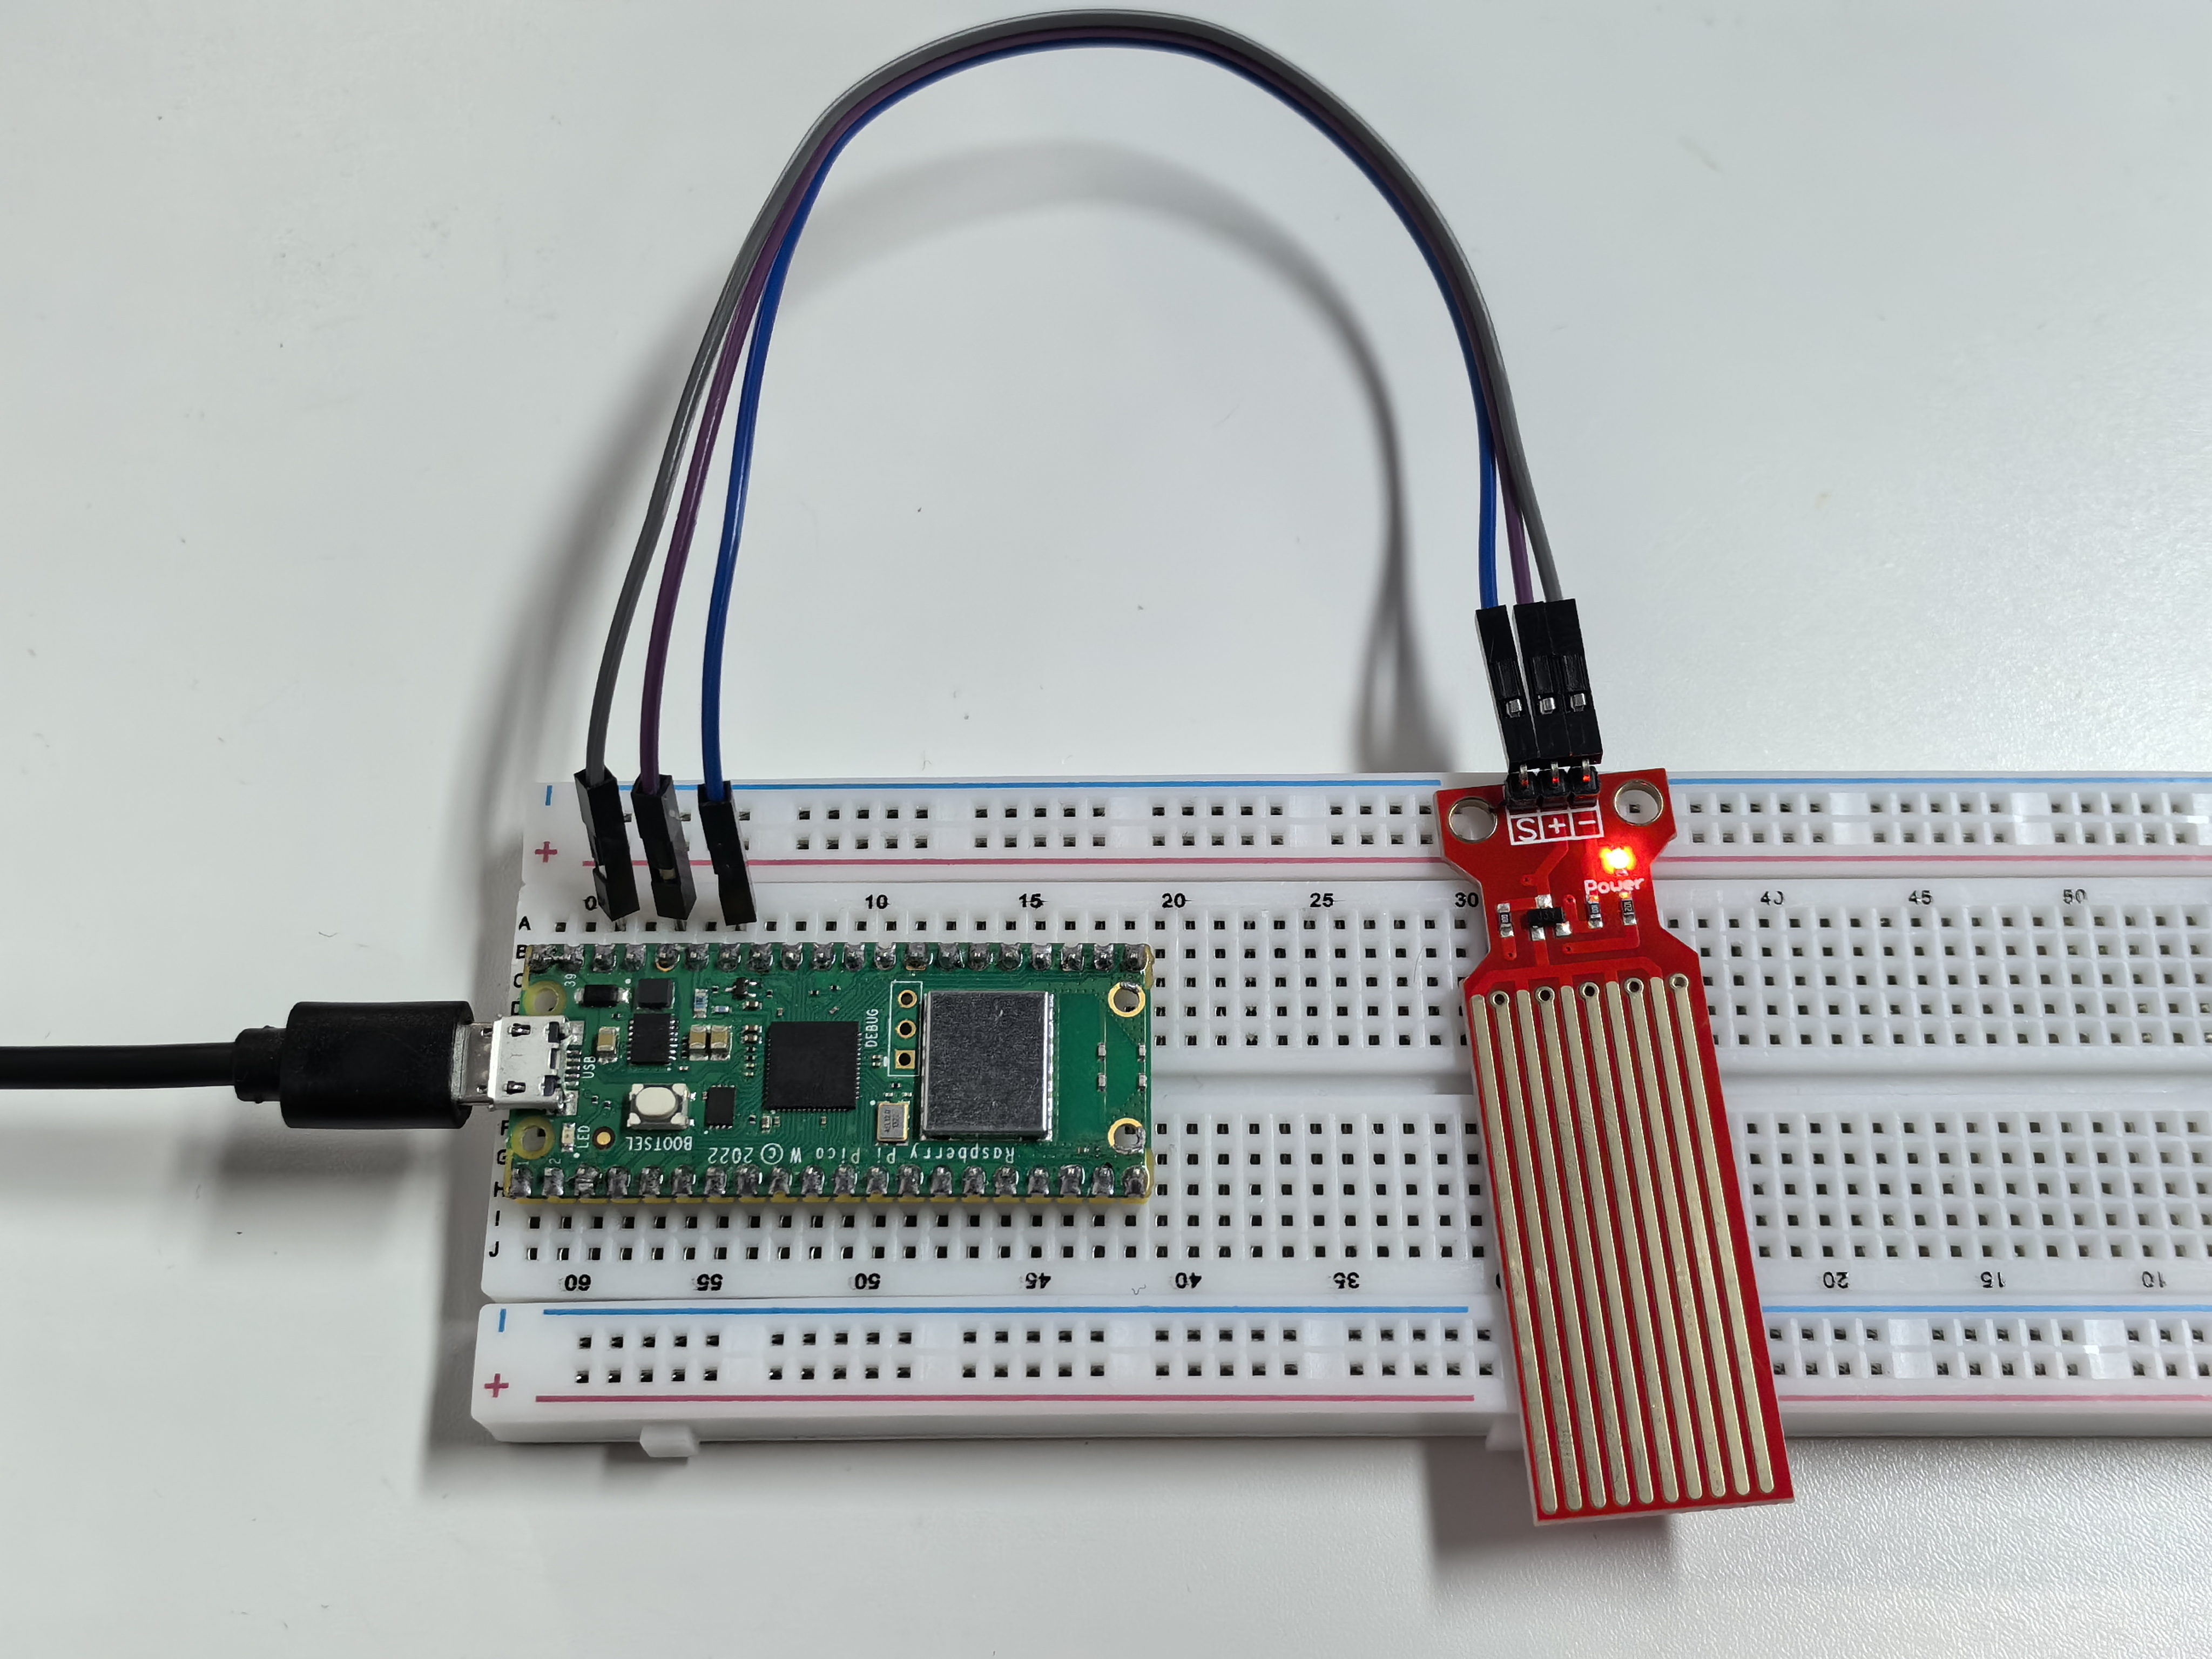
Water Level Sensor Module x1
Component knowledge
Water Level Module
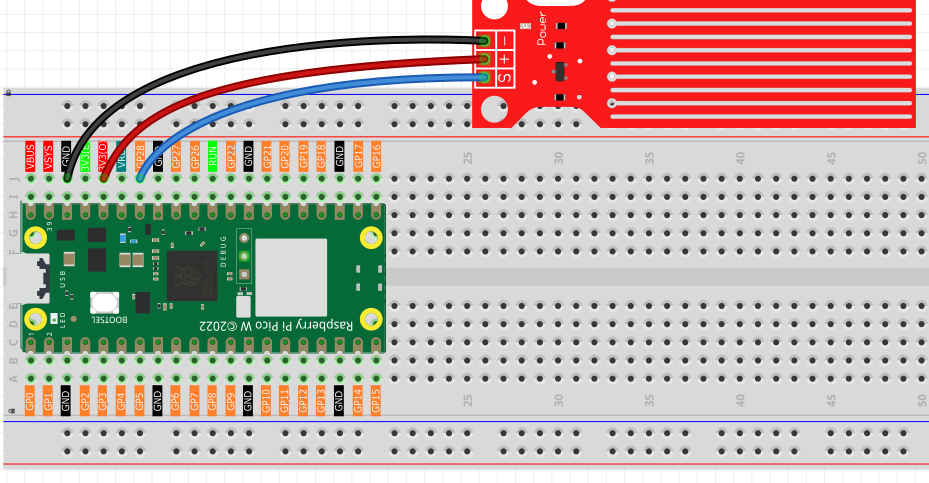
Connect
Code
Note
Open the
1.14_water_sensor.inofile under the path ofUltimate-Starter-Kit-for-Pico-W\Arduino\1.Projector copy this code into Thonny, then click “Run Current Script” or simply press F5 to run it.Or copy this code into Arduino IDE.
Don’t forget to select the board(Raspberry Pi Pico) and the correct port before clicking the Upload button.
After the program is run, submerge the Water Sensor module slowly into the water, and as the depth increases, the Shell will print a larger value.
The following is the program code:
const int sensorPin = A2;

void setup() {
Serial.begin(9600);
}

void loop() {
int sensorValue = analogRead(sensorPin);
Serial.println(sensorValue);
delay(100);
}
Phenomenon